I generally use gum paste with my electronic cutter. It is relatively easy to make and very inexpensive. My recipe is very sturdy and even delicate, intricate pieces are easy to handle and put on a cake. You can go to youtube and enter Linda McClure in the search box and you will be directed to several short videos. I show how to make gum paste, roll it out, and how to get a great cut using an electronic cutter. I have a video showing how to print designs on gum paste. I generally keep pre-made sheets of gum paste on hand and ready to use when I need them.
At a recent cake show I decided to use icing sheets to demonstrate the Silhouettes abilities. It was so convenient to have a product ready to use. There are several companies that make icing sheets. I have tried all of the different brands and have found that Icing Images work extremely well with the electronic cutters. Icing Images has a line of thicker icing sheets. In fact, Icing Images is working to improve on their product to make it work even better for the electronic cutter. They will be carrying colors other than white. Even though gum paste is very inexpensive to make, I find the convenience of ready made icing sheets out weighs the cost.
You can order your icing sheets form http://www.icingimages.com/
This is a short description of the product from their web site.
"About Icing Sheets
Icing Sheets are an actual layer of icing that bonds with the icing on the cake, and come in a variety of sizes and shapes. Our Icing Sheets are made of sugar, taste great, and will last up to a year on the shelf when properly sealed. Refrigeration is not required. All of our Icing Sheet products are FDA approved and Kosher.
Icing Images offers House brand sheets, Lucks brand sheets, and Premium brand sheets. The Premuim brand offers the largest printing surface, and is the thickest, followed by the Lucks brand.
Icing Images offers the best prices and unparalleled customer support for all of its products. We are always happy to provide a free phone consultation to help you with selecting the right imaging system and supplies to meet your needs.”
Traditionally, you would print an image on an icing sheet and apply it to a buttercream cake. The sheet merged with the frosting and you had a very personal cake with very little effort. When I first learned about icing sheets, I was hooked! It made decorating cakes so much easier. Add an icing sheet picture to the top of a cake, a nice border and the cake was done. This helped me keep my cost down so I could offer my great tasting cakes at a very reasonable price.
In time, my wedding cakes were the center of my business and I stopped making novelty cakes. I would occasionally print an icing sheet for a groom’s cake, but that was the extent that I was using icing sheets.
Icing sheets are not limited to having a picture printed on them on put on the top of a cake. I will show you several ideas using icing sheets in a different manner. Icing sheets can be used to decorate all-over your cake.
Even if you don’t have an Edible Printer System and an electronic cutter, you can still use icing sheets to decorate a cake. You will find several tools in the craft and scrapbooking section at the craft store. When deciding if a tool is safe to use with your icing sheet, ask yourself this. Can I wash and sanitize this tool. Is it made from a food safe material. There are several tools cake decorators use everyday that were not made specifically for cake decorating, but work well and are safe to use.
Don’t think of your icing sheet as something you print a picture on and stick on the top of your cake. Think of your icing sheet as a blank canvas. Your goal is to decorate the icing sheet and then treat it like you would a piece of scrapbook paper. Food color takes the place of paint and edible food markers take the place of sharpie markers. You can paint, draw designs, use stamps and even emboss the icing sheet. Go from dull to fabulous with pixie dust! Paint the icing sheet with some gum glue, sprinkle on some bright, shiny petal dust, let the icing dry a bit and you will be able to cut out beautiful, colorful designs. Each technique gives the icing sheet a scrapbook like quality. The scrapbook section of the craft store will become your new favorite place to shop. I have said for a long time, if you can cut it out of paper, I can cut it out of sugar. Now you can decorate your sugar just like you would paper.
Coloring the icing sheet
The best food coloring to use with icing sheets are gel or paste colors. Put a small amount of color in a flat dish and work with it like you would paint. Your goal is to get an even covering of color on the icing sheet. This can be accomplished with a sponge brush, a regular soft bristle brush or you can sponge on the color with a natural sea sponge. These techniques are similar to faux finishing.

This example was accomplished with a soft bristle brush. I used straight gel coloring and brushed the color on in one direction.
These next examples were created using a sea sponge. If you find that your color is too thick, thin it down with some Everclear alcohol. You can also use Vodka. The alcohol will dry very quickly, but try not to get the color too thin. Your icing sheet will get very weak if it has too much moisture added to it. When doing a faux finish use your imagination. You can sponge on a single color, or you can sponge on several colors. Don’t feel like you are limited to a sponge. You can wad up plastic wrap and use it to dab on color. You can also use a stiff paint brush and stipple on the color. To do this you load up the end of the brush with color and randomly touch the surface of the icing sheet. This can also be accomplished with multiple colors. Do a little research into faux painting and see how easy it is to get impressive results. You can easily create a beautiful icing sheet for your cake designs.


For best results, remove the icing sheet from the baking paper. Let it sit for a bit to dry out some. It will be much easier to handle, but don’t let it sit out so long that it cracks up. After you have decorated the icing sheet, it can be stored in the bag it came in until you need to use it. Make sure the bag is sealed tight, or the icing sheet may dry out and crack up when you try to cut out designs.


You can create some very lovely and interesting designs with some very basic craft supplies. You will need a ruler, x-acto knife, decorative edge scissors and a paper punch. Wilton now has craft punches you can use with icing sheets.

This first example is with a plain white icing sheet. Using the ruler as a guide, cut off 2 “ from the bottom of the icing sheet.

Use the decorative edge craft scissors to cut a border design. There are many different styles of craft scissors and each one will give a different design. This is a basic scallop design.

Use the paper punch and punch out your design. There are many different designs, and the punches come in all sizes.


The border cut with the craft scissors and a flower design made with the punch. The same design shown cut out of the different finished icing sheets.


You can add designs to your icing sheet with rubber stamps. There are rubber stamps with every design you can think of. You can add the design all-over the icing sheet and then cut out your designs, or you can cut
around the individual designs. You can stamp strips of cut icing sheets to make border designs for your cake.


You stamp the icing sheet just like you would a sheet of paper. Practice this technique on a piece of plain paper before you stamp your icing sheet. For best results, use a gel color. Apply the color to a dense piece of foam. Make sure you have plenty of color on the foam pad. Push your stamp into the color and lift straight up. Check the bottom of the stamp. You do not want the color to be dripping off. Place the stamp on the icing sheet and carefully push straight down. Do not move the stamp around on the icing sheet or the color will smear. Lift the stamp straight up and you will have a clean, clear image. Apply the designs on the icing sheet where you need them. Every design you can imagine is available in rubber stamps. Get creative and you will be able to create very unique designs for your cake.


You can embellish your plain white icing sheet with other food coloring items. Try some colored super pearl for a nice shine, or fairy or pixie dust. If it can be used in cake decorating you can safely use it on an icing sheet. You can even add a fine sanding sugar. These come in a variety of colors. Paint a thin coat of gum glue to the icing sheet then sprinkle the product onto the icing sheet. Let it dry and set up a bit before cutting out your design. Experiment with the different coloring products we use in cake decorating. You can even air brush the fine powders onto an icing sheet.

When you airbrush your icing sheet use the airbrush color used for cake decorating. Apply several thin, even coats until you get the look you desire. Let the icing sheet dry some between coats. Do not over saturate the icing sheet or it will melt. You can achieve some great results with an airbrush.

I have shown several ideas for decorating a plain white icing sheet. Icing Images has come out with icing sheets in different colors. They have a chocolate sheet that is amazing to work with. Here is an example of a cake I made using the chocolate icing sheet. The intricate detail is amazing, and the sheets were a breeze to cut. I did not need to remove them from the backing sheet. I simple taped the icing sheet to my carrier sheet and cut the design with my Silhouette. You can see this technique is greater detail here.

You can add some texture to your icing sheets with an embossing folder. You place a square of the icing sheet into the embossing folder and apply pressure. This can be done with a machine called the Sizzix Sidekick machine. Or you can put your icing image in the embossing folder and run it through your Kitchen Aide pasta machine. Make sure the opening on the pasta machine is set to the widest opening. You can even just use your hand and press down on the embossing folder. Put pressure all-over the surface and the design will press into the icing sheet.


This is an example of an icing sheet that has been airbrushed and embossed.

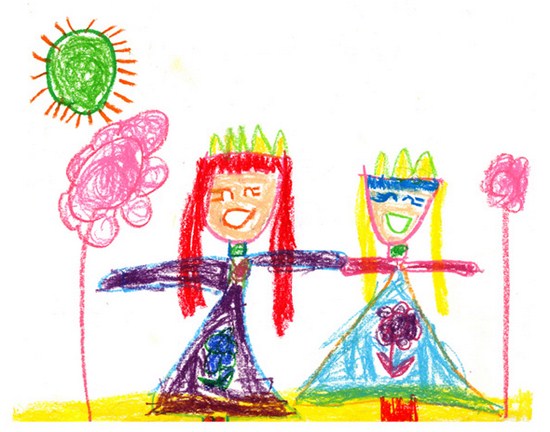
Children are so creative. Let them show off their art work in a decorated cake. Give them an icing sheet the size you need for your cake. They can color their pictures with edible markers. Apply their picture to the cake and finish with a piped border. A child can design their own birthday cake or a cake for any occasion. Young or older, your child or grandchild will love to be the cake artist!

When looking for tools to use for decorating your icing sheets, don’t forget the hardware store. Some of my favorite cake decorating tools come from the home improvement store. Look in the paint section for the tools used in faux finishing. Make sure the tool can be washed and sanitized. It may not have been originally designed for cake decorating, but you can find inexpensive tools that will expand your creativity.


You do not have to decorate a cake you made. You can decorate store bought treats. Cookies, Reese Cups, Moon Pies or Little Debbie snack cakes. Store bought or home made cupcakes look great with extra decorations you add.


Icing sheets are great fun to work with. Whether you are decorating a wedding cake, your childs birthday cake or store bought cookies, you will find them easy and economical to use. Your best source for icing sheets is from Icing Images.


